
Basic Formatting
We will now look at how to write abstracts, as well as how to format a LATEX document into different chapters, sections and paragraphs.
Abstracts
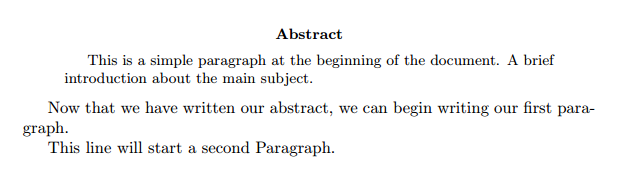
In scientific documents it’s a common practice to include a brief overview of the main subject of the paper. In LATEX there’s the abstract environment for this. The abstract environment will put the text in a special format at the top of your document.
1
2
3
4
5
6
7
\begin{document}

\begin{abstract}
This is a simple paragraph at the beginning of the
document. A brief introduction about the main subject.
\end{abstract}
\end{document}

Paragraphs and newlines
1
2
3
4
5
6
7
8
9
10
11
\begin{document}

\begin{abstract}
This is a simple paragraph at the beginning of the
document. A brief introduction about the main subject.
\end{abstract}

Now that we have written our abstract, we can begin writing our first paragraph.

This line will start a second Paragraph.
\end{document}
When writing the contents of your document, if you need to start a new paragraph you must hit the “Enter” key twice (to insert a double blank line). Notice that LATEX automatically indents paragraphs.
To start a new line without actually starting a new paragraph insert a break line point, this can be done by \ (a double backslash as in the example) or the \newline command.
Care should be taken that multiple \ or \newlines are not used to “simulate” paragraphs with larger spacing between them, as this can interfere with LATEX’s typesetting algorithms. The recommended method to do so is to keep using double blank lines to create new paragraphs without any \, and then add \usepackage{parskip} to the preamble.
Chapters and Sections
Commands to organize a document vary depending on the document type, the simplest form of organization is the sectioning, available in all formats.
1
2
3
4
5
6
7
8
9
10
11
12
13
14
15
16
17
18
19
20
21
22
23
\chapter{First Chapter}

\section{Introduction}

This is the first section.

Lorem  ipsum  dolor  sit  amet,  consectetuer  adipiscing
elit.   Etiam  lobortisfacilisis sem.  Nullam nec mi et
neque pharetra sollicitudin.  Praesent imperdietmi nec ante.
Donec ullamcorper, felis non sodales...

\section{Second Section}

Lorem ipsum dolor sit amet, consectetuer adipiscing elit.
Etiam lobortis facilisissem.  Nullam nec mi et neque pharetra
sollicitudin.  Praesent imperdiet mi necante...

\subsection{First Subsection}
Praesent imperdietmi nec ante. Donec ullamcorper, felis non sodales...

\section*{Unnumbered Section}
Lorem ipsum dolor sit amet, consectetuer adipiscing elit.
Etiam lobortis facilisissem
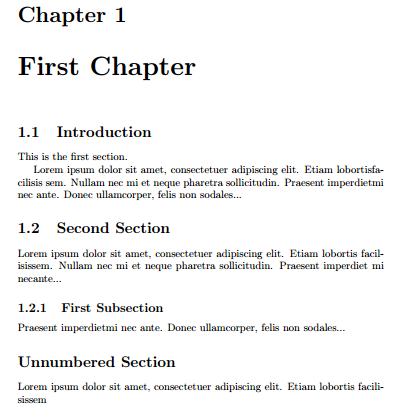
The command \section{} marks the beginning of a new section, inside the braces is set the title. Section numbering is automatic and can be disabled by including a * in the section command as \section*{}. We can also have \subsection{}s, and indeed \subsubsection{}s. The basic levels of depth are listed below:
-1 \part{part}
0 \chapter{chapter}
1 \section{section}
2 \subsection{subsection}
3 \subsubsection{subsubsection}
4 \paragraph{paragraph}
5 \subparagraph{subparagraph}
Note that \part and \chapter are only available in report and book document classes.
Creating tables
Creating a simple table in LATEX
Below you can see the simplest working example of a table
1
2
3
4
5
6
7
\begin{center}
\begin{tabular}{ c c c }
 cell1 & cell2 & cell3 \\
 cell4 & cell5 & cell6 \\
 cell7 & cell8 & cell9
\end{tabular}
\end{center}
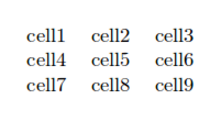
The tabular environment is the default LATEX method to create tables. You must specify a parameter to this environment, in this case {c c c}. This tells LATEX that there will be three columns and that the text inside each one of them must be centred. You can also use r to align the text to the right and l for left alignment. The alignment symbol & is used to specify the breaks in the table entries. There must always be one less alignment symbol in each line than the number of columns. To go to the next line of your table, we use the new line command \. We wrap the entire table inside the center environment so that it will appear in the center of the page.
Adding borders
The tabular environment is more flexible, you can put separator lines in between each column.
1
2
3
4
5
6
7
8
9
\begin{center}
\begin{tabular}{ |c|c|c| }
 \hline
 cell1 & cell2 & cell3 \\
 cell4 & cell5 & cell6 \\
 cell7 & cell8 & cell9 \\
 \hline
\end{tabular}
\end{center}
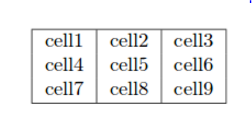
| You can add borders using the horizontal line command \hline and the vertical line parameter | . |
{ c c c } </b>: This declares that three columns, separated by a vertical line, are going to be used in the table. The symbol specifies that these columns should be separated by a vertical line. - \hline : This will insert a horizontal line. We have included horizontal lines at the top and bottom of the table here. There is no restriction on the number of times you can use \hline.
Below you can see a second example.
1
2
3
4
5
6
7
8
9
10
11
12
13
14
15
16
17
\begin{center}
 \begin{tabular}{||c c c c||}
 \hline
 Col1 & Col2 & Col2 & Col3 \\ [0.5ex]
 \hline\hline
 1 & 6 & 87837 & 787 \\
 \hline
 2 & 7 & 78 & 5415 \\
 \hline
 3 & 545 & 778 & 7507 \\
 \hline
 4 & 545 & 18744 & 7560 \\
 \hline
 5 & 88 & 788 & 6344 \\ [1ex]
 \hline
\end{tabular}
\end{center}

Creating tables in LATEX can be a bit tricky sometimes, so you may want to use the TablesGenerator.com online tool to export LATEX code for tabulars. The File > Paste table data option lets you copy and paste data from spreadsheet applications.
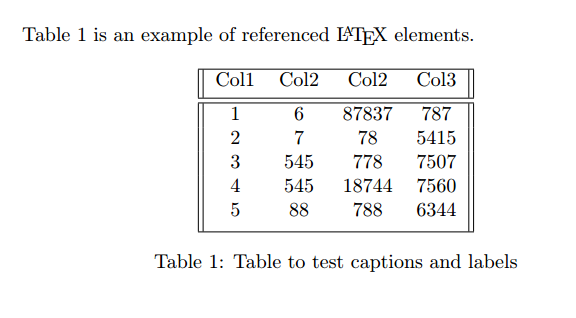
Captions, labels and references
You can caption and reference tables in much the same way as images. The only difference is that instead of the figure environment, you use the table environment.
1
2
3
4
5
6
7
8
9
10
11
12
13
14
15
16
17
18
referenced \LaTeX{} elements.

\begin{table}[h!]
\centering
\begin{tabular}{||c c c c||}
 \hline
 Col1 & Col2 & Col2 & Col3 \\ [0.5ex]
 \hline\hline
 1 & 6 & 87837 & 787 \\
 2 & 7 & 78 & 5415 \\
 3 & 545 & 778 & 7507 \\
 4 & 545 & 18744 & 7560 \\
 5 & 88 & 788 & 6344 \\ [1ex]
 \hline
\end{tabular}
\caption{Table to test captions and labels}
\label{table:data}
\end{table}
Adding a Table of Contents
To create the table of contents is straightforward, the command \tableofcontents does all the work for you:
1
2
3
4
5
6
7
8
9
10
11
12
13
14
15
16
17
18
19
20
21
22
23
24
25
26
27
28
29
30
31
32
33
34
35
36
\documentclass{article}
\usepackage[utf8]{inputenc}

\title{Sections and Chapters}
\author{Gubert Farnsworth}
\date{ }

\begin{document}

\maketitle

\tableofcontents

\section{Introduction}

This is the first section.

Lorem  ipsum  dolor  sit  amet,  consectetuer  adipiscing
elit.   Etiam  lobortisfacilisis sem.  Nullam nec mi et
neque pharetra sollicitudin.  Praesent imperdietmi nec ante.
Donec ullamcorper, felis non sodales...

\section*{Unnumbered Section}
\addcontentsline{toc}{section}{Unnumbered Section}

Lorem ipsum dolor sit amet, consectetuer adipiscing elit.
Etiam lobortis facilisissem.  Nullam nec mi et neque pharetra
sollicitudin.  Praesent imperdiet mi necante...

\section{Second Section}

Lorem ipsum dolor sit amet, consectetuer adipiscing elit.
Etiam lobortis facilisissem.  Nullam nec mi et neque pharetra
sollicitudin.  Praesent imperdiet mi necante...

\end{document}
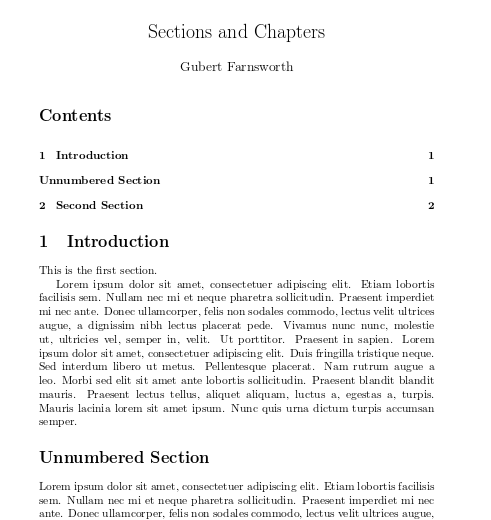
Sections, subsections and chapters are automatically included in the table of contents. To manually add entries, for example when you want an unnumbered section, use the command \addcontentsline as shown in the example.